When Mollie asked for a Barbie dollhouse for her fifth birthday last March, I immediately starting scouring websites and stores for all the options available to us that were close to our budget. Unfortunately, what I came up with were a lot of either uber pink plastic houses (that are apparently a real pain to put together, can't sleep more than one or two dolls, and aren't durable) or sized incorrectly for the dolls they are supposed to house, and none of them seemed to be worth what they cost. During my search, a lot of homemade dollhouses kept popping up, piquing my DIY interests to the extreme. "Why not craft the exact dollhouse I'd like Mollie to have?" I thought. So I dove in head-first, sketching out a floor plan and refining the dimensions for the space I had in mind for it. She had already amassed quite a few Barbies, and I wanted the house to be able to fit all of them comfortably, so the final plan ended up being large enough that the house would be a semi-permanent fixture in the living room for the foreseeable future. All the more reason to do it up right, right?
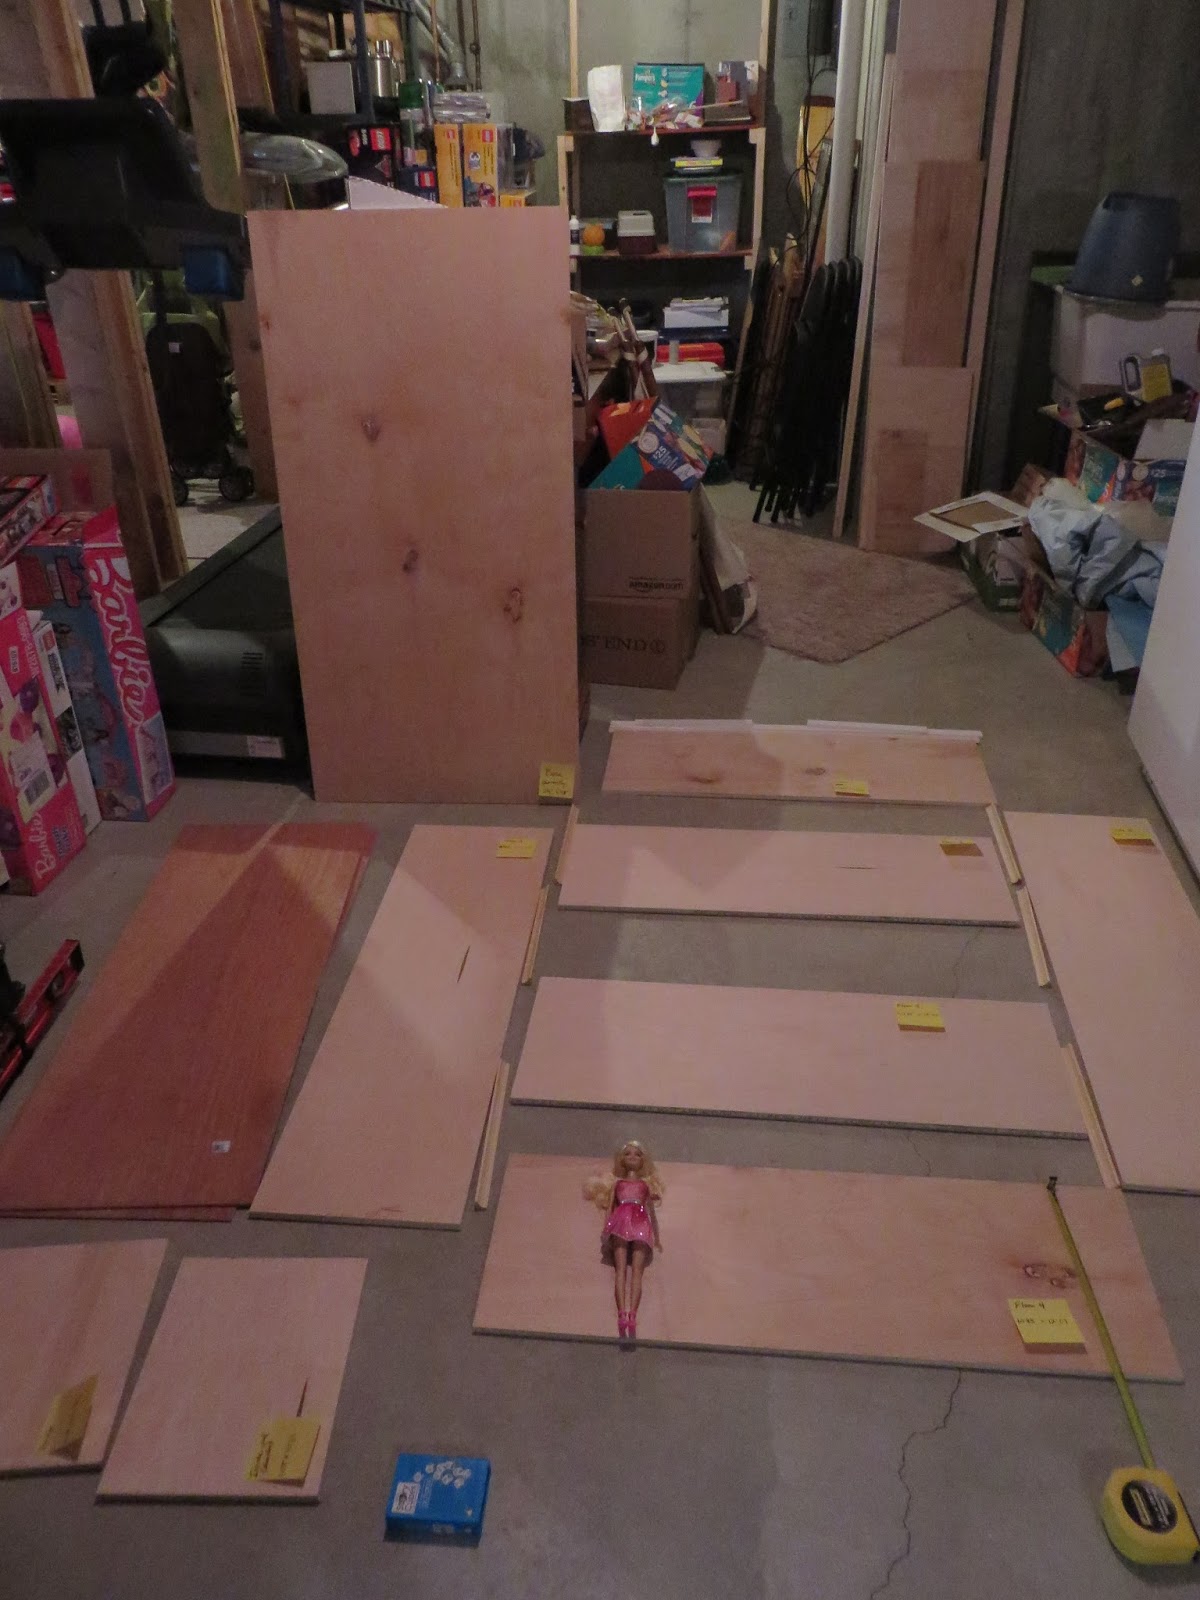
I set off to Home Depot to gather all the necessary supplies and was instantly overwhelmed with all the wood I came home with.
I set off to Home Depot to gather all the necessary supplies and was instantly overwhelmed with all the wood I came home with.

Once I got it laid out, though, it seemed more manageable.
I had to pick up a few more tools, namely hole saws and a couple clamps to go with the ones we borrowed from our dads. (Thanks, guys!) Then I set to work making bubbly-looking windows.


Unfortunately, the wood didn't cut quite as cleanly as I had hoped it would.


Let's just say, I had a lot of patch work to do, not to mention all the sanding!
I had casually asked Amalia once while we were picking stuff up at Lowe's one day which wood stain she liked best. After carefully considering it, she picked one, and that is the one I ended up using to stain the "hardwood" floors of the house. Ooh, and they were wipes, so I didn't have to deal with a drippy paint can! Win-win!

Mollie wasn't in school all day yet, so I did a lot of the work after the kids were in bed and here and there when I could get someone to watch one or both of them.

Math and measuring are not my strong suits, so I had to lay this bad boy out multiple times before I did any finish painting or assembling.

I even taped the paint chips to the boards so I wouldn't forget exactly which room was which color.

I was a little stumped as to what to do with the ceilings, but I happened upon some glow-in-the-dark paint at Lowe's when I was picking up some extra supplies and decided to give that a try. (In hindsight, I probably wouldn't do this again; that part of the house rarely sees any direct light, so they never get "charged up" enough to really glow. Oh well, it was a cool idea anyway.)

Since I had been the one to decide to make an epic dollhouse in less than a month, I did a lot of the work myself, though I didn't really mind it at all; most of the time I felt like my heart was filling with each paint stroke, each sanding, as if this was my love letter to my daughter.

I can't really tell you how excited I was when it all started to come together a bit more.

I wanted the top of the dollhouse to eventually be a little terrace area for Mollie (when she's actually tall enough to see the top of it), so I thought I'd add a decorative railing of sorts to keep any of the Barbies from falling off the edge. This trim was just perfect with all the little dots!

The actual painting took quite a while since I couldn't retape the rooms to start on the next color until the coat I had just done was completely dry. Luckily there was a lot of other stuff for me to do in the meantime, so little time was wasted. (This, by the way, was a huge triumph for me; often I am the reigning queen of wasted time.)

Once all the walls were painted, the floors stained, the base sanded and painted, and the last details complete, it was time to put it together.


He did not, however, appreciate me pausing to take pictures of him.

Through the process, we learned a lot about wood glue and corner clamps and things of that nature.

A few nights before her birthday and the party, I finally got to paint the "railing" in greater detail. It was so much fun!

It was a bit of a struggle at some points, trying to use the tools we already had (and had already borrowed) and still make it right, but I really can't tell you how excited I was with the results.

I have to say, I really could not have finished the project this well and on time without the incredible help of my dear husband. Thanks again, Bryson!

I sneaked in a second coat of paint on the dots one morning before the reveal, then I got it all assembled (including adding dollhouse linoleum in the bathroom and laundry room) and ready to go.

The day of the party, my dad, Bryson, and our friend Shaun helped haul it up the stairs. Thank goodness it fit, since that is one thing I had neglected to measure!

At first, Mollie had no idea what it was. Then, when she realized it was a Barbie house, she was overjoyed!

I am happy to report that she has grown to love it even more. I have since added a curtain in the bedroom (the giant room at the top) so the littler girls can have some extra quiet when they sleep, and lots of furniture and love have filled up some of the space.


Mattel has come out with a lot of cool house accessories for Barbie, but so many of them actually come with a Barbie now, and we were starting to develop an overpopulation problem. So when it came to procuring a stove and sink, I ended having to make one from scratch so she wouldn't have to deal with one more plastic mouth to feed. And, I have to say, I am pretty happy with the way it turned out.

My favorite detail is still the top trim. I just love the punch of color it adds where you least expect it.

So that's it! Amalia's Barbie house in all its glory. I'm so thrilled with how it has turned out and how well it has held up thus far. (Knock on wood!) And, of course, how much she loves it and uses it ... that's the best, by far.
1 comment:
Wow!! How adorable!
Cynthia
Post a Comment